
There are tombs in games that challenge your brain, tombs that challenge your patience, and then—every once in a while—there comes a tomb that quietly reaches into your spine and squeezes. Mist-Shrouded Prison in Kaifeng is that tomb. It’s atmospheric, claustrophobic, confusing, a little nightmarish, and by far one of the most misunderstood puzzle dungeons in Where Winds Meet.
Players enter the tomb expecting spike traps, hidden chests, and the usual treasure run. Instead, they find themselves walking through looping hallways, climbing the same ladder more than once, second-guessing every corridor, and eventually getting jumpscared by a red-tinted phantom. It’s the kind of dungeon that makes you pause the game, take a deep breath, and tell yourself, “It’s just pixels. It’s fine.”
Until it isn’t fine.
Because after all of this, after suffering through the red hallway, the spike rooms, the jail cells, the prison corridors, and the final treasure route… the game throws one last curveball:
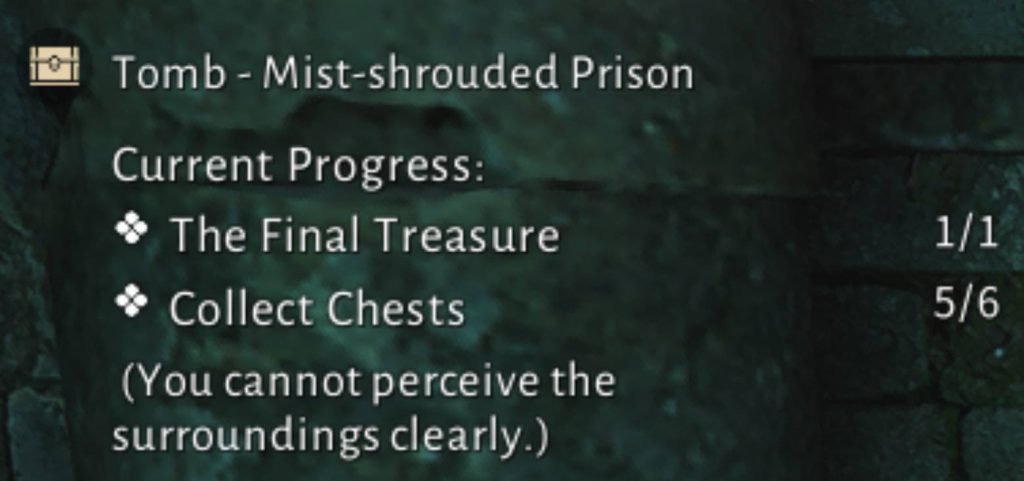
Collect Chests: 5/6
And suddenly every player has the exact same reaction:
“Where in the world is the 6th chest?”
That’s why this guide exists. To break down the Mist-Shrouded Prison from start to finish, explain why the tomb behaves the way it does, highlight every chest’s location, and—most importantly—pinpoint the exact spot where players miss the sixth chest.
This is not a basic quick overview. This is the full, deep, breakdown designed for anyone who wants a 100% Kaifeng region completion, zero confusion, and zero lingering “stuck at 5/6 chests” frustration.
Let’s begin.
1. Understanding Mist-Shrouded Prison: A Tomb Built to Mess With You
Mist-Shrouded Prison is not designed like other tombs. It intentionally uses:
- Repeated corridors
- Subtle room changes
- Multi-stage trap environments
- A red-horror atmosphere
- Moving spike ceilings and floors
- Evolving room designs
- Hidden gaps and new openings that only appear after progression
- A ladder sequence meant to unsettle you
- A lower section that only becomes accessible after triggering a hidden event
Mechanically, it is simple.
Emotionally, it feels like a psychological labyrinth.
The tomb wants you to feel confused. It wants you to wonder if you took the wrong turn, if you missed a puzzle, if something reset, if the game glitched, or if the rooms are deliberately looping. That’s the entire theme. The tomb is a prison for perception—the player’s perception.
When the game shows the text:
You cannot perceive the surroundings clearly
it’s not being poetic. It’s literally describing the experience.
So before we get into the actual chest locations, it’s important to understand one thing:
The tomb is intentionally designed to make you overlook one specific chest.
Almost every stuck player reports the same list:
- Red room chest
- Two spike room chests
- Spiked wall chest
- Jail cell chest
That makes five.
The sixth lies in an area that players mentally cross off as “completed.”
2. The Full Chest & Treasure System Inside the Tomb
The Mist-Shrouded Prison has:
- 1 Final Treasure (deepest part of the tomb)
- 6 normal chests (scattered across upper, mid, and lower sections)
Most players have no trouble finding 5 of the 6 chests. The difficulty lies in how the tomb rearranges certain paths based on:
- Triggering the “red lady” ladder event
- Reaching the spike-ceiling room
- Opening what appears to be a revisited chest room
- Unlocking a new, hidden gap behind or near a previously looted chest
- Entering the lower tunnel from the updated version of that chest room
- Overlooking one chest tucked in the lower region
To really understand the missing chest, we need to map the entire tomb in three phases:
Phase 1 – Surface level and early spikes
Phase 2 – Illusion/loop section
Phase 3 – Lower prison tunnels and final treasure zone
Every chest belongs to one of these.
Let’s walk through the tomb exactly the way players experience it.
3. Phase 1: Entering the Prison & Gathering the First Chests
When you walk into Mist-Shrouded Prison, the atmosphere hits immediately. Dim torches. Tight corridors. Sounds that echo too loudly. The tomb wastes no time introducing you to classic spike traps—floor spikes, wall spikes, predictable patterns to get you comfortable.
Then comes the first major chamber: the vertical spike trap room.
Chest #1 – Upper Spike Trap Chest
In this room:
- The floor spikes rise straight up like an elevator.
- You can time your steps, jump onto them, ride them upward, and leap off to reach the small room above.
- Inside is the earliest chest most players grab.
This early spike-room chest is extremely important later in the dungeon, because this room changes after a certain event. But for now, you loot it and move on.
Chest #2 – Spike Wall Chest
Soon after, you encounter a corridor with a retracting spiked wall. Behind it is another chest. This one is hard to miss because the wall moves in front of your face.
That’s chest two.
Then the atmosphere shifts.
A faint red glow seeps into the walls. Footsteps echo when you don’t move. Shadows coil in ways they shouldn’t.
You have entered the horror wing.
4. The Red Room and the Looping Corridor Phase
Now, you step into what most players call the red room—a glowing red corridor or chamber with a chest inside.
Chest #3 – Red Room Chest
You grab this chest and press forward. This is usually the point where players relax a little, thinking the dungeon is still normal.
Then the looping begins.
The Ladder Loop
You walk down a corridor, climb a ladder, and emerge into a room. Then you move forward, loop slightly, and find yourself climbing what seems to be the same ladder again.
You are not crazy.
The tomb is intentionally forcing you through a loop to:
- Disorient your perception
- Set the stage for the horror event
- Prepare the tomb for a progression update
The Red Lady Event
On the third or so climb, the game jumpscares you with a red-tinted female apparition at the top of the ladder.
This moment is crucial.
It is not optional.
It is not “just a jumpscare.”
It is a progression trigger.
After this moment:
- Certain rooms change
- A hidden gap appears later
- The lower section becomes accessible
- Chest #6 becomes collectible
- The final treasure path becomes active
Players who never saw this event cannot possibly access the sixth chest.
5. The Spike Ceiling Room and Hidden Gap Path
After surviving the red lady, you move into the spike ceiling chamber.
This room is tall, unsettling, and very quiet. When you activate the mechanism, the spikes slowly descend like a metal ceiling pressing down on you.
Most players panic.
Some freeze.
Others panic-run around the room.
How the Room Actually Works
The spikes are not meant to crush you. They are meant to be:
- A mechanic
- A platform
- A mobility tool
You’re supposed to jump onto the descending spikes, let them carry you up, and leap onto a ledge above.
Chest #4 – Upper Spike Ceiling Chest
On that upper platform is another chest.
Most players get it.
But this is the moment where the tomb hides its greatest secret.
The Hidden Gap
Behind or near the chest platform is an almost invisible gap—a dark opening in the floor or wall. It’s so subtle that 90% of players walk right past it without knowing.
This gap is the entrance to:
- The lower tunnel system
- The final treasure route
- And the location of the 6th chest
Some players reach this gap naturally after the red lady event causes a room transition. Others must backtrack after noticing they’re missing something.
Either way, this gap is the turning point of the entire tomb.
6. Phase 3: The Lower Prison Tunnels (Where the Final Treasure & 6th Chest Hide)
Dropping into the tunnel below feels like entering a different tomb entirely.
The air is colder.
The walls are damp.
The layout is tighter.
And the atmosphere feels like you’re going deeper than you’re supposed to.
This is the true “Mist-Shrouded Prison” part of the tomb.
Here, you’ll eventually reach:
Chest #5 – Jail Cell Chest
This one is obvious. In one of the cells, there’s a chest inside. You open the cell, loot it, and continue your journey.
Most players think this is the last chest they need before grabbing the final treasure.
They’re wrong.
Because the lower prison tunnels are larger than they look.
There’s another chest tucked deeper inside.
This is the one almost everyone misses.
7. Where the 6th Chest Actually Is (The One Everyone Misses)
Now we reach the heart of the guide: the location of the elusive sixth chest.
Players almost always collect these five:
- Red room chest
- Chest behind spiked wall
- Upper spike-room chest
- Upper spike-ceiling chest
- Jail cell chest
But the sixth chest is not on the beaten path.
It is located in the lower tunnel system, reachable only after the red lady event and only accessible once the earlier chest room “updates” into its second version.
**The Exact Location:
A Hidden Side Chamber in the Lower Section**
After you drop down into the lower tunnels, but before you reach the final treasure, there is a small, dimly lit off-path chamber that contains the sixth chest.
Most players run directly from the tunnel drop to the final treasure marker, completely ignoring the tunnel’s branching paths.
The 6th chest sits in:
- A tucked-away alcove
- Slightly behind a bend
- Off the main progression route
- In a chamber that feels like an unimportant dead-end
Because the tomb feels oppressive and players are eager to leave, they sprint through the tunnels and head straight for the treasure exit—missing the sixth chest entirely.
8. The Final Treasure & Why It Doesn’t Count as the 6th Chest
When you reach the end of the lower tunnels, you drop into the last area and open the Final Treasure chest.
This is its own separate category.
It does not count toward the “Collect Chests” objective.
That’s why the UI often reads:
- Final Treasure: 1/1
- Chests: 5/6
You technically finished the tomb…
… but you didn’t complete the tomb.
This is why players are confused.
They think the final treasure counts as the missing chest.
It doesn’t.
9. The Most Common Mistakes Players Make (Why 5/6 Happens)
1. Not triggering the red lady event
Without this, the tomb never updates and the lower chest cannot be reached.
2. Going through the lower tunnels too quickly
The 6th chest sits off the main route; rushing means missing it.
3. Believing they already cleared the spike room
The early spike-room chest area becomes important again later.
4. Dropping into the lower tunnels and running straight toward the final treasure
You have to explore the side passages.
5. Not realizing the tomb changes layout as you progress
Chest rooms “evolve” as you advance deeper.
10. A Simple Checklist to Guarantee 6/6 Chests
If you’re reading this with the tomb still showing 5/6, here’s the fastest way to fix it:
Step 1:
Return to the very first spike-room chest area.
Step 2:
Check if a new opening or gap exists behind or beside the original chest.
Step 3:
Drop into the lower tunnels.
Step 4:
Before heading for the final treasure, explore of every side path.
Step 5:
You will find the 6th chest in a side chamber near the lower prison tunnels.
11. Final Thoughts: Mist-Shrouded Prison Is a Masterpiece of Confusion
The tomb is confusing by design.
The loops, the jumpscare, the evolving chest rooms, and the difficult-to-spot gaps all serve one purpose:
To make you doubt your perception.
It works.
Most players leave thinking:
- “The dungeon bugged.”
- “I missed something impossible.”
- “The chest counter is wrong.”
- “I’m never 100% completing Kaifeng.”
But the truth is simpler:
The missing chest is there.
It’s just hidden in a part of the tomb the game expects you to revisit calmly, not rush past in panic.
With this guide, you now know exactly how the tomb works, how the layout shifts, and—most importantly—where that elusive chest is waiting.
You can now walk back into Mist-Shrouded Prison with confidence, finish your 6/6, and finally see Kaifeng’s completion meter fill up exactly the way it should.