
The Bad Neighborhood quest in Of Ash and Steel is one of those early-game side quests that feels way harder than it should. No quest markers, no minimap help, tall grass everywhere… and four tiny wheels scattered around the area. On top of that, you meet Radim when you’re still getting used to combat and exploration, so it’s easy to get lost or overwhelmed.
In this guide, I’ll walk you through the quest step by step like a friend sitting next to you:
- Where to find Radim and start Bad Neighborhood
- Clear, landmark-based directions for all four of Eleanor’s Wheels
- How to deal with enemies and environmental hazards on the way
- How to get Rye for the Hermit and finish the quest fast
- Extra tips to combine this quest with other early-game exploration
Of Ash and Steel Bad Neighborhood Quest Walkthrough – How to Start the Quest
Where to find Radim and Eleanor’s broken cart
You can only start Bad Neighborhood after you leave the starting region and make your way through the first abandoned village on Greyshaft Island. From the village, head toward the wooden bridge that leads out of the area. Just beyond this bridge, a merchant shouting for help will catch your attention – this is Radim, standing next to his cart that’s missing all four wheels. Talking to him starts the “Bad Neighborhood” side quest.
A few key points before you begin:
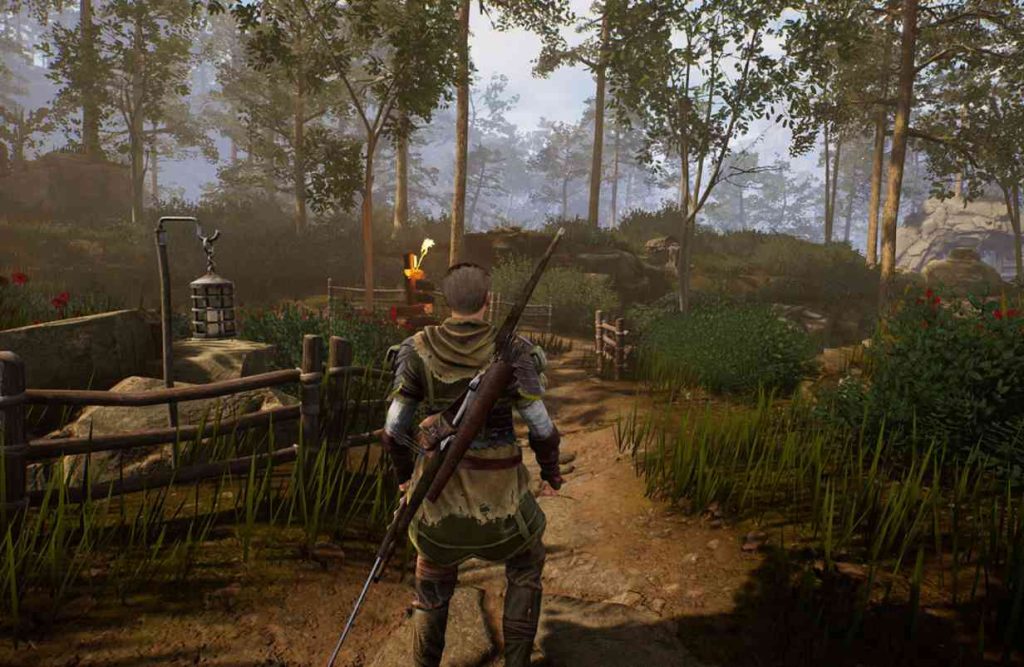
- Recommended level: The quest is marked as Medium, around level 3 on fan quest lists. If you’re level 2 and careful, it’s still doable, but don’t come here at level 1 unless you like pain.
- Quest objective: Radim needs four wheels that have been scattered around the nearby ruins, camp, and forest paths.
- No quest markers: This game is designed without hand-holding. You will rely on landmarks – rocks, tents, ruined walls, carts, and a hut in the forest – instead of glowing icons.
When you talk to Radim, exhaust his dialogue so you fully accept the quest. He’ll make it clear the wheels are somewhere around the nearby ruined village and along the river.
For easier explanation, imagine you’re standing facing Radim, with:
- The bridge behind you (toward the village)
- The river running to one side
- Open ground and hills stretching out around you
We’ll use Radim as the central reference point for all four wheels.
How to Find Eleanor’s Wheels in Of Ash and Steel – Overview of All Wheel Locations
Here’s a quick mental map of where each wheel is relative to Radim:
- Wheel 1 – Near the river and broken wall, reached by heading toward the bridge but turning off before you cross it.
- Wheel 2 – At a small barricaded camp with a tent, on the opposite side from the river.
- Wheel 3 – Very close to Wheel 2, near a cart by the rocks.
- Wheel 4 – Across the bridge and deeper into the woods, at a Hermit’s hut, and you must trade two Rye to get it.
Now let’s go step by step from Radim so you can grab them in a smooth loop.
Wheel 1 Location in Of Ash and Steel – Ruined Wall by the River
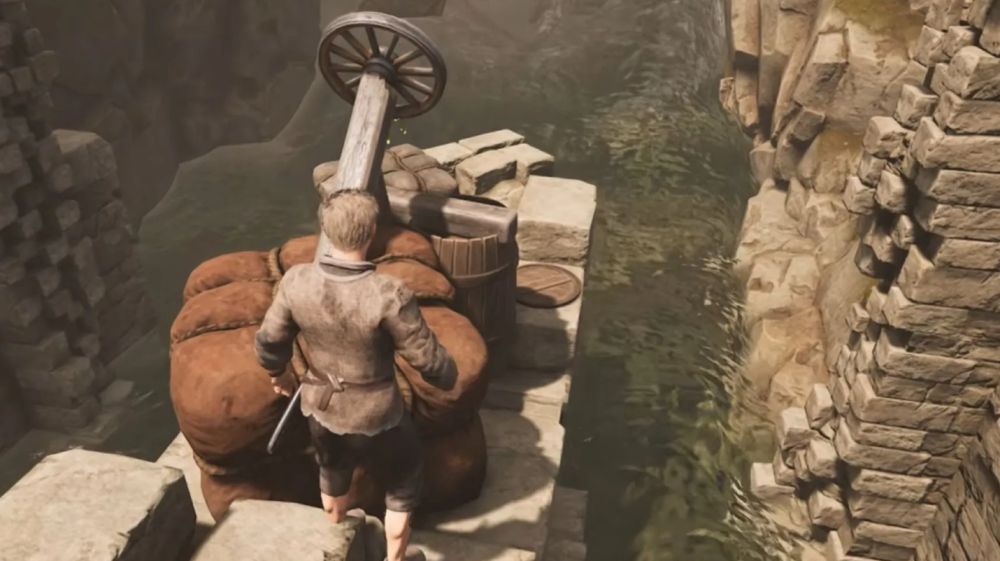
Heading direction: Start from Radim and go left, toward the bridge and the river.
Step-by-step path to Wheel 1
- Stand facing Radim.
- Turn left and walk toward the dirt path that leads to the wooden bridge.
- After a short walk, you’ll notice the path splits into two:
- One branch goes straight toward the bridge.
- The other angles slightly off to the side.
- Take the branch that leads toward the bridge, but do not actually cross the bridge.
- Before the bridge, turn right, keeping the river on your left and some low hills on your right.
- Follow this narrow path that runs alongside the riverbank, past a few rocky bumps and patches of grass.
- Eventually, you’ll spot a wooden plank laid across to a broken stone wall structure that juts out over the river.
Walk across the plank and climb onto the broken wall. The first wheel is lying on top of this ruined wall, near the edge overlooking the water.
Tips for Wheel 1
- Watch your footing: It’s easy to fall off into the river if you sprint or roll carelessly on the wall.
- Check for enemies: In some runs, there may be a creature or two near the ruin (reports mention a Hobster-type enemy guarding one of the wheel ruins). Clear them out first so you can loot calmly.
- After you pick up the wheel, return all the way to Radim. From here, we’ll change direction for Wheel 2.
Wheel 2 Location in Of Ash and Steel – Tent and Barricades Camp
Heading direction: From Radim, go right, away from the river, toward a camp with a tent.
Step-by-step path to Wheel 2
- Stand again facing Radim at his broken cart.
- Now turn right, toward a large rock that sits near him.
- Walk past the big rock and continue straight across the rough ground.
- Keep an eye on your right-hand side as you move:
- You’re looking for a cluster of wooden barricades and
- A small tent set up like a mini camp.
- As soon as you see the barricades and the tent, head over there. The area looks like it was used as a temporary outpost or bandit camp.
The second wheel is lying to the left of the tent’s entrance, close to the ground.
Extra loot and clue at Wheel 2
Inside or around the tent, you’ll usually find:
- A couple of basic resources (crafting mats, food, or small loot).
- A note or document hinting that someone traded a wheel away, which ties into the Hermit having the final wheel.
Pick up everything – especially the note, since it gives lore context and may be referenced in later exploration.
Wheel 3 Location in Of Ash and Steel – Cart by the Rocks
Heading direction: From the tent where you got Wheel 2, hug the rock wall and look for a cart.
Wheel 3 is close enough that you should grab it right after Wheel 2 without returning to Radim yet.
Step-by-step path to Wheel 3
- Stand at the entrance of the tent where you just found Wheel 2.
- From the entrance, turn your character left, facing the nearby rocky slope or cliff.
- Start walking while staying close to the rocks, almost brushing them with your shoulder.
- As you move along this line of rock, you will soon see a wooden cart positioned slightly ahead of you.
- Walk up to the cart. The third wheel is lying on the ground just to the left of it.
This one is easy to miss if you wander too far away from the rocks and start looping back toward Radim, so stay tight to the cliff side.
Tips for Wheel 3
- Scan the ground carefully. The wheel blends into the soil and foliage. Use your interaction prompt whenever you suspect loot nearby.
- If you came here at night, consider using a torch so the cart and wheel are easier to see.
Once you have Wheel 3, you can either:
- Head back to Radim to mentally reset your bearings, or
- Move directly toward the bridge to go for Wheel 4.
I recommend returning to Radim so all directions in your head start from the same anchor point.
Wheel 4 Location in Of Ash and Steel – Hermit’s Hut and Rye Trade
Heading direction: From Radim, go toward and across the bridge, then follow a narrow forest path to a Hermit’s hut.
This is the trickiest part of the quest, because:
- The path is narrow and easy to overshoot.
- The location is deeper in the woods, near what players describe as an abandoned village / graveyard area.
- The wheel is actually held by an NPC, not lying on the ground, and you must trade two Rye to get it.
Step-by-step path to Hermit and the fourth wheel
- From Radim, turn toward the bridge that leads back toward the abandoned village side.
- Walk straight and cross the wooden bridge this time (unlike in Wheel 1, where we stopped before it).
- On the other side of the bridge, move forward a bit until you reach a more open patch of ground.
- Look for a narrow side path leading off into the trees and hills:
- It’s less obvious than the main road, more like a worn footpath.
- It may appear as a slightly darker track in the grass heading uphill.
- Take this narrow path and do not deviate from it. Just keep following it as it winds between trees, rocks, and possibly past old grave markers or ruined structures.
- Stay on it until you reach a small hut, isolated from the rest of the area. This is the Hermit’s hut.
Inside the hut, you’ll find a sleeping NPC named Hermit. He has the fourth wheel, but won’t just hand it over.
How to Get Rye for the Hermit in Of Ash and Steel – Trading for the Last Wheel
When you interact with the Hermit, you’ll discover that he has Eleanor’s wheel but wants two Rye in exchange. This matches what you see hinted from the camp note and confirmed by other players: the wheel was sold to the Hermit in exchange for supplies.
Options to get two Rye
You have a few ways to bring him what he wants:
- Buy Rye from Radim or nearby vendors
- Radim can provide Rye bottles if you have enough gold.
- Some players also mention woodcutters or other traders nearby as sources.
- Bring Rye in advance
- If you explored earlier and looted food/drink containers, you might already have enough Rye in your inventory.
- In that case, just speak to the Hermit and choose the option to give him two Rye.
- Loot Rye in the area
- Look around camps, ruins, and abandoned buildings in the nearby region; Rye can sometimes be found in containers or on tables.
Once you have two Rye, interact with the Hermit again and confirm the trade. He’ll hand over the fourth and final wheel for Eleanor’s cart.
Return to Radim – Completing Bad Neighborhood and Eleanor’s Wheels Quest
With all four wheels in your inventory:
- Follow the forest path back from the Hermit’s hut.
- Cross the bridge again toward Radim.
- Approach Radim and start a conversation.
- Choose the dialogue option to hand over the wheels.
The quest Bad Neighborhood will complete, granting you:
- Gold: Fan quest lists show a reward of around 50 gold.
- XP: Around 150 experience, which is very helpful early on.
This also improves your early-game economy and helps you level up to tackle other nearby quests and tougher enemies on Greyshaft.
Tips and Tricks for Bad Neighborhood in Of Ash and Steel
Manage enemies around the abandoned village
The path leading toward Radim and the surrounding area can have insectoid or beast enemies, which are very punishing at low levels. Some tips:
- Pull enemies one by one. Use ranged attacks or cautious movement to avoid being surrounded.
- Use terrain. Narrow paths and rocks can block larger enemies and give you safe angles.
- Rest and heal before crossing the bridge. Don’t walk into the Hermit path half-dead, especially if you aggro anything on the way.
Come prepared with basic gear
Before focusing on this quest:
- Make sure your main weapon is repaired.
- Have at least some healing items or food.
- If possible, unlock a few early combat skills or stances so fights in this area aren’t miserable.
Mark mental landmarks
Since there’s no map marker, try to build a mental image like this:
- Radim = center.
- River and broken wall = Wheel 1 zone.
- Barricades + tent = Wheel 2.
- Cart by rocks near tent = Wheel 3.
- Bridge + narrow forest path + Hermit hut = Wheel 4.
If you get turned around, just return to Radim and re-orient from there instead of wandering in circles.
Of Ash and Steel Bad Neighborhood Walkthrough – FAQ
Q: Can I complete Bad Neighborhood later, or does it expire?
No, the quest doesn’t have a strict time limit in current versions of the game. You can start it when you meet Radim, leave to do other things, and then come back later when you’re stronger to collect the wheels safely. (Always double-check patch notes in future, but right now it behaves like a normal side quest.)
Q: Do I have to give Rye to the Hermit, or can I kill him?
Early player discussions and guides focus on trading two Rye to the Hermit to get the wheel. Some players experiment with killing NPCs, but this can break questlines or cause long-term consequences in games like this. For a clean and safe completion, it’s strongly recommended to trade instead of attacking him. Steam Community+1
Q: Is Bad Neighborhood worth doing early?
Yes, for several reasons:
- It gives early gold and XP, which you really need.
- It forces you to learn how to navigate without quest markers, which is basically the core design of Of Ash and Steel.
- You naturally explore areas that connect to other quests and secrets around Greyshaft.
Final Thoughts – Mastering Eleanor’s Wheels in Of Ash and Steel
The Bad Neighborhood quest looks simple on paper – “find four wheels” – but because Of Ash and Steel removes a lot of modern UI guidance, it becomes a real test of observation and pathfinding.
If you remember just one simple pattern, you’ll be fine:
- Left along the river for Wheel 1 at the broken wall.
- Right to the tent for Wheel 2 at the camp, then just left of the rocks for Wheel 3 at the cart.
- Across the bridge and along a narrow forest path for Wheel 4 at the Hermit’s hut, where you trade two Rye.
Finish all that, hand the wheels to Radim, and Eleanor’s cart will finally be roadworthy again – and you’ll be one step closer to feeling confident in exploring Greyshaft without a minimap holding your hand.