
The Pearlglow Lake Seven Beauties clue is one of the most confusing exploration tasks in Where Winds Meet, because nothing in the game clearly explains what these “beauties” are.
Players see the exploration book page, see the cryptic line “Search for the legendary Seven Beauties of Pearlglow Lake”, check the small circle marked on the map, and then find absolutely nothing — no cats, no NPCs, no obvious interactables.
This makes the Pearlglow Lake Seven Beauties keyword extremely frustrating because the hint is vague, the environment is large, and the mission doesn’t tell you what “beauties” refers to.
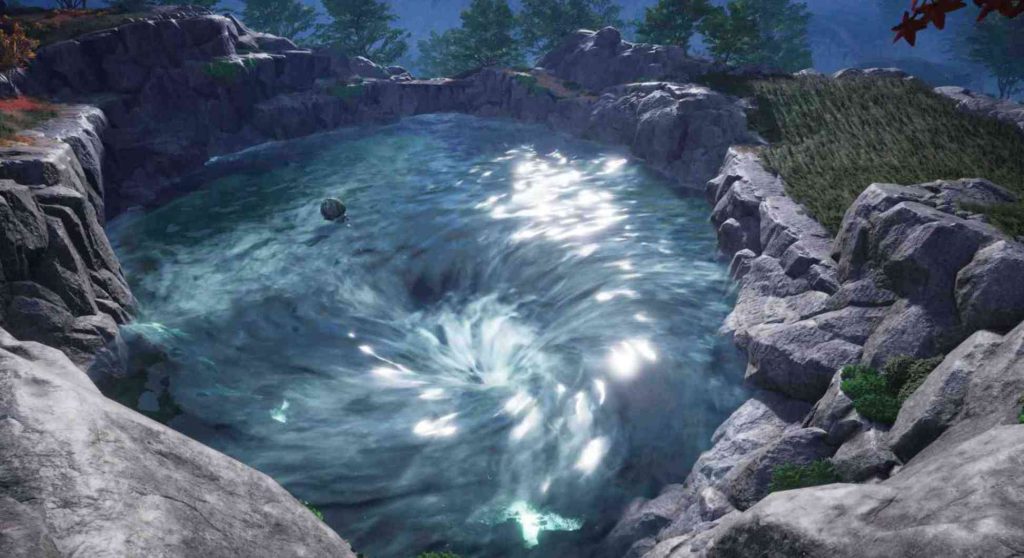
The confusion increases when players also unlock the Velvet Shade area around the same time, which mixes multiple exploration entries together. The Pearlglow Lake task looks like it should be simple — but it’s actually one of those poetic Chinese-style exploration clues referring to scenic landmarks, not creatures or NPCs. Understanding that the Seven Beauties refer to environmental scenes and not physical objects is the key to completing this exploration puzzle.
Quick Fix
The Seven Beauties of Pearlglow Lake are seven scenic viewpoints scattered around the lake area — not cats, NPCs, or items. Stand at each viewpoint until the camera auto-frames the scene, and it will count as one “beauty.”
Step 1 – Understand What “Seven Beauties of Pearlglow Lake” Actually Means
The biggest misunderstanding comes from assuming that the “beauties” are:
- Cats
- Characters
- Items
- Enemies
- Interactables
But in Chinese Wuxia tradition, “beauties” often refers to landscape scenes, such as:
- Waterfalls
- Glowing trees
- Bridge views
- Cliff overlooks
- Light reflections
- Mist formations
Pearlglow Lake follows this literary tradition.
The Seven Beauties are scenic moments the developers want you to stand in the right spot and admire.
When you stand in the correct location for each beauty:
- A camera auto-pan activates
- A short framed scene appears
- Your exploration book checks off that beauty
This step helps because it corrects the core misconception — you’re not searching for objects, you’re uncovering scenic viewpoints tied to Pearlglow Lake lore.
Step 2 – The Circle on the Map Only Marks the Central Area, Not Every Beauty
The map circle misleads players into thinking all Seven Beauties are inside the marked zone.
They are not.
The marked circle indicates the starting focus of the clue, not the actual location of the entire objective.
The Seven Beauties are spread:
- Around the lake
- Along nearby ridges
- On cliff edges
- Near glowing trees
- By the waterline
- Along bridges and elevated walkways
- By mist reflections
This step helps because it frees you from staring at the tiny circle thinking everything should be there. The Seven Beauties exist around the general region.
Step 3 – Start by Scanning the Pearlglow Lake Perimeter
Your search should follow the shoreline of Pearlglow Lake.
Most beauties trigger near:
- Small jetties
- Fishing spots
- Mist-covered waterlines
- Lotus clusters
- Breaks in the tree line
Move slowly along the shoreline and stop whenever you notice:
- A strong visual composition
- Light shining on water
- Unusual trees
- Mist glowing
- Perfectly framed background ridges
Each of these may be a viewpoint.
This helps because the Seven Beauties are deliberately framed near natural scenic composition points.
Step 4 – Look for Camera Auto-Frame Spots (The Exploration Trigger)
When you walk into the correct spot for a Pearlglow Lake beauty:
- The camera shifts
- The screen frames the scenery
- A tiny scene title sometimes appears
- The exploration book checks off a beauty
These triggers activate when:
- You stand on a small ledge
- You reach a scenic point
- You approach a cliff edge
- You stand on a platform facing the lake
- You look toward an important landmark
If the camera doesn’t auto-frame, you haven’t found a beauty yet.
This step helps because it confirms how the game detects scenic viewpoints.
Step 5 – Search These Common Scenic Beauty Types Around the Lake

To help you locate views faster, look for these categories — Pearlglow Lake uses them heavily:
1. Water-Mist Reflection Beauty
Found along the lake edge where morning mist hangs low.
Stand where reflections appear clearest.
2. Glowing Tree or Floral Beauty
Certain trees or bushes glow at dusk.
Look for luminous vegetation near water.
3. Cliff-Overlook Beauty
A high point above the lake that offers a wide scenic shot.
Usually a ridge or small cliff balcony.
4. Bridge-Crossing Beauty
A stone or wooden bridge that creates symmetry across the lake.
Stand in the middle for the camera trigger.
5. Light-through-Mist Beauty
Look for streaks of sunlight breaking through fog.
These are usually morning-specific beauties.
6. Lotus Cluster Beauty
A place where lotus flowers float densely near the edge of the lake.
These typically auto-trigger near fishing spots.
7. Shadow-and-Ripple Beauty
Where shadows from trees fall across the water perfectly.
Often near steep forest edges.
This step helps because the Seven Beauties are always composed around classic scene types like these.
Step 6 – Use Time of Day to Reveal Hidden Scenic Beauties
Some scenic triggers only appear clearly during certain lighting — especially around Pearlglow Lake, which has strong atmospheric fog.
Try revisiting the lake at:
- Morning (mist clarity)
- Evening (glow and warm light)
- Midday (strong reflections)
The lighting dramatically changes how the game frames scenery.
This step helps because some players stand in the right spot but miss triggers due to wrong time-of-day conditions.
Step 7 – Check Cliff Edges Facing the Lake
Several beauties appear when standing on cliff edges facing downward toward the lake. These cliff viewpoints give:
- Panoramic lake views
- Mist movement across the water
- Light streak views
- Elevated scenic sweeps
Walk the cliff path around the lake and stop at every natural “balcony” space.
This helps because cliffs offer dramatic scenic frames, making them prime Seven Beauties locations.
Step 8 – Check Small Platforms, Rocks, and Outcroppings
The Seven Beauties often trigger when you stand on a:
- small outcropping,
- raised rock,
- wooden platform,
- carved stone slab.
These spots are placed subtly. Look for:
- worn-down footprints
- flat stones facing the lake
- slightly raised edges near cliffs
You’ll notice subtle cues hinting where the developers expect players to stand.
This helps because the trigger circles are tiny and easy to miss unless you recognize these visual clues.
Step 9 – Scan Shrines and Ritual Spots Near the Lake
Pearlglow Lake contains:
- shrines,
- prayer stones,
- ritual sites,
- incense altars.
Some scenic beauties trigger when you stand behind or beside these, facing the lake.
Shrine areas often highlight:
- spiritual scenery
- water-glow reflections
- symmetry between nature and architecture
This step helps by tying scenic viewpoints to spiritual landmarks around the lake.
Step 10 – Expand Beyond the Map Circle — Several Beauties Are Outside It
At least three of the Seven Beauties are outside the circle marked on your map.
This circle only marks the central portion of the quest clue.
Check:
- paths leading outward,
- forest edges touching the lake,
- altitude shifts above and below the circle,
- the perimeter of the lake beyond the circle.
This helps because assuming everything is inside the circle wastes time.
Step 11 – Remember: Beauties Trigger Only When Facing Correct Direction
Sometimes players stand in the correct spot but face away from the scenic view.
This prevents the beauty from triggering.
To avoid this:
- Always face the lake
- Look toward natural light
- Turn until the scenery “makes sense”
The auto-camera will activate as soon as your positioning is right.
This helps because perspective matters — viewpoint puzzles require correct orientation.
Step 12 – Use the Exploration Book to Track Progress
After discovering each “beauty,” your exploration book auto-updates.
Check it:
- after each camera frame,
- after exploring suspicious spots,
- after completing a scenic view.
If a beauty didn’t register:
- adjust your angle,
- step slightly forward or backward,
- check the area for alternate platform locations.
This helps because the exploration book is the only confirmation you’ve found a beauty.
Step 13 – Follow the Lake Clockwise for the Easiest Search Route
To avoid missing viewpoints, follow this search method:
Start at the northern tip of the lake
Work clockwise along the shoreline.
Check left-side rock outcroppings
These usually contain mist-heavy scenic frames.
Move to eastern cliffs
Higher ridges hold dramatic viewpoints.
Circle down to southern platforms
These contain bridges and shrine-based beauties.
Finish at western forest edges
Lotus and reflection beauties are found here.
This step helps because a clockwise loop ensures complete coverage without confusion.
Step 14 – Beauties Are Always Environmental, Never Combat or NPC Based
Some players think they need to:
- kill bosses,
- find animals,
- interact with objects,
- solve puzzles,
- chase cats.
None of these are required.
Pearlglow Lake beauties are purely aesthetic.
This helps because it stops players from wasting time on unrelated tasks.
Step 15 – If a Beauty Doesn’t Trigger, Try Leaving and Returning
Occasionally, a scenic spot won’t trigger due to:
- lighting bugs,
- camera bugs,
- environmental loading delay.
Solution:
- fast travel away
- return to Pearlglow Lake
- revisit the same scenic point
Triggers almost always activate after reloading the area.
This step helps because it resolves technical hiccups that block scenic triggers.
Final Thought
The Seven Beauties of Pearlglow Lake in Where Winds Meet are environmental scenic viewpoints scattered around the lake’s perimeter — not cats, items, or NPCs. By following the shoreline, checking cliff views, revisiting shrines, and watching for camera auto-frame triggers, you’ll uncover each of the Seven Beauties and complete the exploration page without confusion.