
So you’ve wrapped up the From the Ashes DLC in Avatar: Frontiers of Pandora, opened your Hunter’s Guide… and yep, there it is.
Bladewing Moth: Not Scanned.
Annoying, right? It’s one of those moments where the game makes you second-guess yourself, like maybe you rushed a mission or missed a one-time scan without realizing it. Totally fair reaction — the DLC doesn’t exactly stop to warn you what’s important and what isn’t.
Here’s the good news first: you didn’t mess anything up. The Bladewing Moth is not missable, and you absolutely can finish this Hunter’s Guide entry after completing the DLC.
No replaying missions, no reloading old saves. You just need to know where to look and how the moth trails work, because the game doesn’t spell that part out very clearly.
Let’s fix that.
Read also: Falling Through the Map in Avatar: Frontiers of Pandora? Solved
Can You Still Scan the Bladewing Moth After the DLC?
Yes. 100%.
Even if you completely ignored the moths during the mission, all Bladewing Moth trails stay active in free roam. No replaying missions, no save scumming, no nonsense.
The game does not lock you out of scanning them just because the story has moved on, and you won’t need to start a new save or redo the DLC to fix a missing Hunter’s Guide entry.
If you’re going for full Hunter’s Guide completion or chasing trophies, you’re still good. You can return to the relevant regions at any time, find the glowing cocoons, and complete the trails exactly as intended.
As long as you follow the moths to the nest and interact at the end, the scan will register properly. In short, it’s a clean post-game cleanup task, not a punishment for missing something earlier.
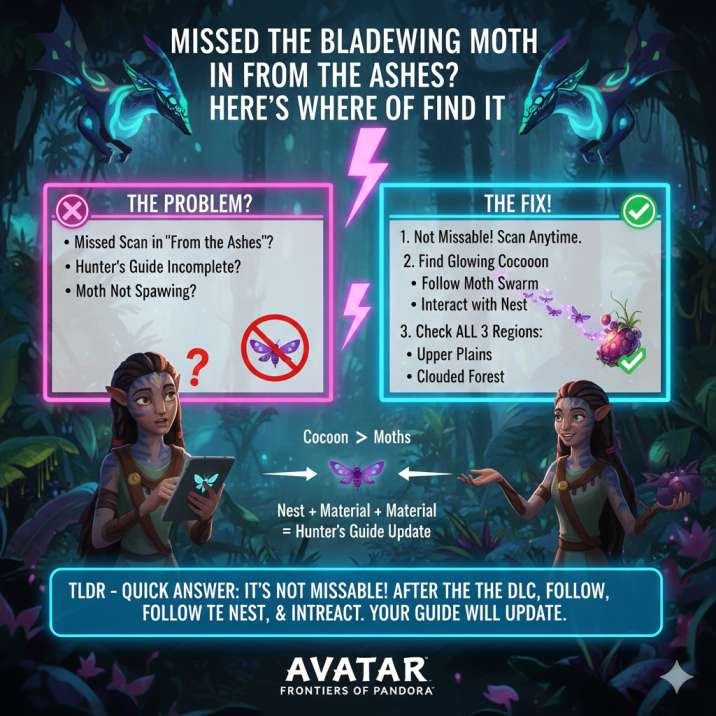
How Bladewing Moths Actually Work ?
Each Bladewing Moth is part of a trail, not a single creature. This is where a lot of players get tripped up, especially if they assume spotting or following the moths alone is enough to complete the Hunter’s Guide entry. The game treats these encounters as short environmental activities rather than simple scans.
Here’s the loop:
Find a glowing cocoon
Interact with it
Follow the swarm of moths as they fly off
Reach the nest
Interact with the hidden fruit / nest
Once you do that, the Hunter’s Guide updates. If you only followed the moths but didn’t interact at the end, it won’t count. The final interaction is what actually completes the trail, so make sure you don’t leave early or assume it’s finished just because the moths stop moving.
Read also: Stuck on the Combined Forces Mission in Avatar: Frontiers of Pandora? Here’s How to Beat It
All Bladewing Moth Locations
There are 11 Bladewing Moth trails total, spread across three regions.
Below are the ones people miss most often, with straightforward directions to help you track them down without wasting time flying aimlessly. The game doesn’t always guide your attention toward these trails, especially once the main DLC story is finished, so it’s easy to overlook a few even if you explored thoroughly during the missions.
These trails are still fully active in free roam, and each one follows the same cocoon-to-nest structure. If a location sounds familiar but you don’t remember completing it, it’s worth revisiting. As long as the cocoon can be interacted with, the trail hasn’t been finished yet. Use the map filters to check collected entries and focus on one region at a time to avoid missing any of the remaining moth trails.
Kinglor Forest
Waterway Valley
Fast travel to Waterway Valley and head toward the small island at the northern edge of the swamp. The area is easy to miss if you stay too high in the air, so drop down closer to the water and scan the island carefully. You’ll find the cocoon sitting on the island, usually glowing enough to stand out once you’re nearby. Interact with it and follow the moths as they lead you away from the island toward the nest. Make sure you stay close to the trail so you don’t lose sight of them in the swampy terrain.
Droplet Islands (Silk Woods)
This trail is located southwest of Hometree. Look for a cocoon resting on a large fallen tree or thick branch. The trail moves across tree trunks and rocks, so take your time following it, especially if you’re on foot.
Gossamer Lakes Area
Near large trees and lake edges. Some cocoons are slightly elevated, so make sure to look up.
Read also: Stuck on the Combined Forces Mission in Avatar: Frontiers of Pandora? Here’s How to Beat It
Upper Plains
Celebration Valley
This Bladewing Moth trail is located south of The Circle and is one of the easiest ones to complete. The terrain here is wide open, with very few obstacles, making the cocoon simple to spot once you’re in the right area. Because visibility is good, you can comfortably follow the moths on foot or with your Ikran without worrying about losing the trail. It’s a good one to knock out quickly if you’re cleaning up remaining entries.
Shattered Bridge
Found in the northeast of the Upper Plains near Weeping Gorge, this trail includes a noticeable jump or elevation change. Using your Ikran makes this much easier, especially if you lose sight of the moths mid-flight.
East of Zakru’s Promise
North of the camp, the cocoon can spawn slightly off the map marker, so search nearby.
Stone Lake Edge
Northwest Upper Plains on the east side of Stone Lake. The trail heads southeast once activated.
Clouded Forest / Great Stone Swamp
The Cut
This Bladewing Moth trail is located southeast of Hydro-Oil Extractor Bravo and is easy to overlook due to how dense the foliage is in this part of the map. Visibility can be limited at ground level, so keep an eye out for the faint glow of the cocoon rather than relying purely on line of sight. Once activated, stay close to the moths as they weave through trees and uneven terrain, since it’s easy to lose them if you fall behind.
Stone Cloud Valley
Found northwest of the Resistance Hideout, this is one of the easiest trails to miss. Flying helps a lot here, especially when following the moths across gaps and vertical spaces.
Remaining Trails
The final two are also in the Upper Plains and Stone Cloud Valley. If you see a cocoon icon on the map, it’s still active and can be completed.
Bladewing Moth Not Spawning? Try This
If you’re standing there wondering why nothing’s happening, don’t panic — this is a fairly common issue and usually not a sign that anything is broken. Bladewing Moth trails can occasionally fail to trigger due to world streaming or loading quirks, especially if you’ve been fast traveling a lot or approaching the area too quickly.
Walk away roughly 50 meters and come back to give the area a chance to reload. If that doesn’t work, fast travel out to a different region and then return to the location. Also make sure “Show Collected” is enabled on the map so you’re not revisiting a trail you’ve already completed. Finally, be sure you’re interacting with the cocoon, not the moths themselves. This is a streaming hiccup, not a progression lock.
Read also: How to Fix the Reverie-2-10 Error in Avatar: Frontiers of Pandora (Services Not Available)
How Many Do You Need for the Hunter’s Guide?
There are 11 trails total, and you need to complete all of them for full Hunter’s Guide completion. There’s no partial credit here — if even one Bladewing Moth trail is unfinished, the entry will stay incomplete. The good news is that none of these trails are affected by story progress, so you can tackle them in any order and at any point after the DLC.
Time of day doesn’t matter, so you don’t need to wait for nighttime or specific lighting conditions. Weather doesn’t matter either, meaning rain, fog, or clear skies won’t affect whether the moths spawn. As long as you properly activate the cocoon, follow the trail, and interact at the nest, it will count. Just finish the trail properly and you’re done.
Quick Final Answer (In Case You’re Skimming)
✔️ Bladewing Moth is not missable — even if you completely skipped it during the DLC mission, nothing is locked or permanently lost. The game is designed to let you clean up these entries later.
✔️ You can scan it after finishing From the Ashes — all Bladewing Moth trails remain active in free roam once the DLC is complete, so you can return at any time.
✔️ No mission replay required — you don’t need to reload saves, restart the DLC, or replay story content to fix this.
✔️ Hunter’s Guide can still be completed — as long as you finish all 11 trails correctly, your guide will update as expected. This is a straightforward cleanup task, not a punishment for missing something earlier.
Read more articles: