
So… you’ve already hit Syrah’s island with 10 ships. Maybe twice. Maybe watched half your fleet melt while the rest awkwardly bumped into each other doing nothing. Yeah — you’re not alone. A lot of players run into the exact same wall and assume they’re missing upgrades or doing something fundamentally wrong.
Here’s the thing most players don’t realize at first: Syrah isn’t meant to be beaten with a single, small, all-in raid. If you treat it like a normal island attack and just send everything in at once, it’ll chew through your ships every time, no matter how confident you feel going in.
The good news? Once you understand how Syrah’s defenses actually work and why small fleets struggle, beating it stops feeling impossible and starts feeling… manageable. With the right approach, the fight finally makes sense.
Let’s break it down.
Why Your 10-Ship Raids Keep Failing
You’re not underleveled, under-teched, or doing anything “wrong.” The real problem is how Syrah is designed as a fight, not how you’re playing it.
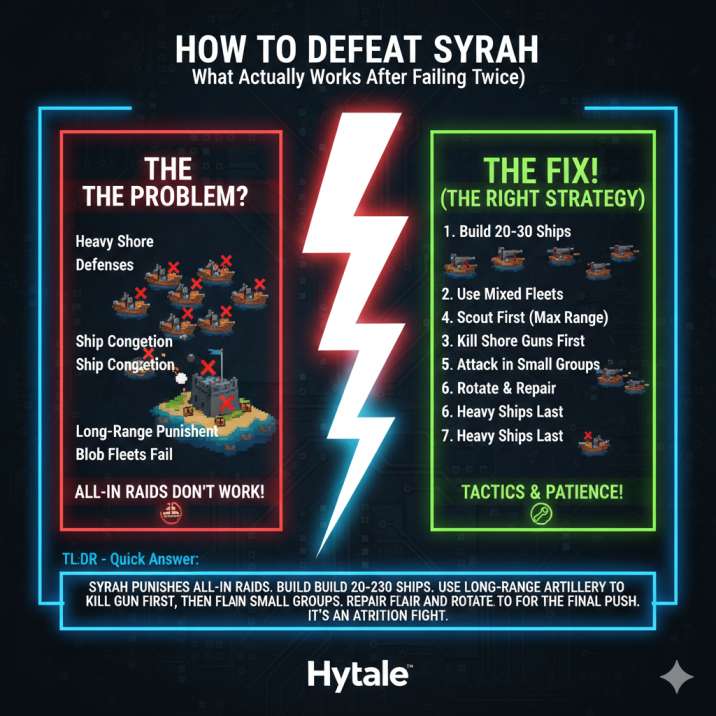
Syrah’s island is built to punish small, direct assaults. It has heavy overlapping shore defenses that cover the same sea lanes, tight approach points that cause ships to bunch up and block each other, and long-range guns that shred fleets that stay in one place for too long.
When you send 10 ships straight in, only a portion of your fleet can actually fire at any given time, while shore cannons are free to hit everything at once. The rest of your ships end up stuck, turning slowly, or waiting for space. It feels like you’re losing to raw strength, but in reality, it’s positioning, congestion, and pacing that are killing your raids.
How Many Ships You Actually Need
Let’s be honest — Syrah isn’t balanced around tiny fleets.
Recommended: 20–30 ships
Bare minimum: ~15 ships (with careful play)
Yes, some players do grind it out with 10 ships, but it’s rarely clean or efficient. That approach usually means running multiple raids, pulling back constantly for repairs, and slowly chipping away at defenses over time. You’ll lose ships along the way, and the progress can feel painfully slow.
For most players, building a bigger fleet is actually faster and cheaper than repeatedly replacing sunk ships. A larger fleet lets you rotate damaged ships, keep pressure on Syrah’s defenses, and avoid the all-or-nothing situations that smaller raids fall into. More ships don’t just mean more firepower — they give you flexibility, control, and room to recover from mistakes.
The Best Fleet Setup for Syrah
You don’t need “the strongest” ships to beat Syrah — you need the right mix of ships doing the right jobs. Throwing a single ship type at the island usually ends in congestion, wasted firepower, and unnecessary losses.
Here’s what works consistently:
Long-range / artillery ships (5–7)
These are your early MVPs. Their main job is to safely delete shore batteries and long-range defenses before they can chew through the rest of your fleet.
Fast or medium ships (8–12)
These ships shine in the mid-fight. Use them for flanking, kiting enemy fire, and clearing smaller or exposed defenses without getting trapped.
Heavy ships (4–6)
Strong, slow, and expensive — save these for the final push once most shore guns are gone.
A few cheap ships
Not glamorous, but extremely useful for soaking fire or baiting defenses.
Balanced fleets win Syrah. Blob fleets don’t.
The Step-by-Step Strategy That Beats Syrah
Step 1: Scout First (Seriously)
Before you commit a single ship to the fight, take the time to sail around Syrah’s island and actually look at what you’re dealing with. This step is easy to skip, but it makes a massive difference in how the rest of the raid plays out.
As you scout, pay attention to shore gun positions, narrow entry points, and areas where multiple defenses overlap their firing arcs. Some approaches look safe at first but turn into kill zones once your ships bunch up and slow down.
Knowing where the danger zones are lets you plan safer angles of attack, decide where to bring long-range ships, and avoid sending your fleet straight into overlapping fire. Going in blind is how fleets disappear — scouting is how you stop that from happening.
Step 2: First Wave = Shore Battery Cleanup
For the first wave, send in only your long-range ships. This is not the moment for fast ships or heavy brawlers — their time comes later. Right now, the goal is controlled, low-risk damage.
Your objective here is simple and focused:
- Destroy shore batteries
- Take out long-range cannons
- Stay at maximum firing range
Position your ships so they can fire without drifting too close to the island. If a ship starts taking heavy damage, pull it back instead of trying to force the kill. The moment you push into the inner defenses, you expose your fleet to overlapping fire and unnecessary losses.
Do not rush this step. Removing shore batteries safely is what makes the rest of the raid possible.
Step 3: Small Groups, Not One Big Blob
Once the outer guns are weakened, it’s time to move in — but not with your entire fleet at once. Instead, send small groups of 4–6 fast ships to handle the next phase of the fight.
These groups should focus on:
- Flanking remaining defenses
- Hitting exposed angles
- Avoiding tight spaces that cause ships to clog up
This part of the strategy is huge. Smaller groups stay mobile, reposition faster, and can actually bring their guns to bear instead of getting stuck behind each other. When you push everything in as one big blob, half your ships end up turning, stopping, or waiting for room.
Smaller groups mean more ships firing at the same time, fewer awkward traffic jams, and far better control over the fight.
Step 4: Rotate, Repair, Repeat
Syrah punishes long, stubborn fights more than almost any other island encounter. Trying to power through with damaged ships is one of the fastest ways to lose an entire fleet.
As soon as ships start taking serious damage, pull them back early instead of waiting for the last second. Rotate fresh ships in, and take the time to repair between waves before committing again. Letting your whole fleet sit at low health turns every shore cannon hit into a potential loss.
This fight is built around attrition, not speed. Multiple short raids with repairs in between work far better than one endless slog where everything slowly falls apart. Staying disciplined here keeps your fleet alive and the pressure on Syrah’s defenses constant.
Step 5: Heavy Ships Go In Last
Only after most of Syrah’s shore defenses are gone should you commit your heavy ships. These vessels are strong, slow, and expensive, which makes them perfect for finishing the fight — but terrible for absorbing early punishment.
At this stage:
- Send in your heavy ships
- Use cheap ships to draw fire
- Push objectives decisively
Let expendable ships soak up the first volleys while your heavies move into position and unload their damage safely. With the majority of shore guns already destroyed, incoming fire is far more manageable.
Once you reach this phase, the fight usually flips in your favor very quickly. With defenses stripped away, Syrah tends to collapse fast and decisively.
Extra Tips That Make This Way Easier
A few small adjustments can make a huge difference when fighting Syrah. First, don’t stack ships in chokepoints. When ships bunch up, congestion kills your damage output, leaves half your fleet unable to fire, and turns narrow approaches into death traps.
If Syrah’s defenses feel especially brutal, use expendable ships as bait. Sending cheaper ships in first can draw shore fire and give your main fleet safe windows to attack. It’s not elegant, but it works.
If one side of the island feels impossible, try attacking from a different angle. Some approaches have far more overlapping defenses than others.
Most importantly, expect some losses. Syrah is an attrition fight, not a flawless win. Losing a few ships doesn’t mean the strategy failed — it means you’re wearing the island down the right way.
Can You Beat Syrah With Just 10 Ships?
Yes… technically, it’s possible to beat Syrah with only 10 ships. But it’s important to understand what that actually involves before committing to it.
With a fleet that small, you’re limited to long-range poke only. You’ll need to destroy a few shore guns at a time, retreat, fully repair, and then repeat the process over multiple raids. Progress will be slow, and mistakes are punished hard.
You also have to accept ship losses along the way. Even with careful play, some ships won’t make it back.
If you’re already struggling, building more ships is usually the smarter move. A larger fleet gives you flexibility, reduces losses, and turns Syrah from a grind into a manageable fight.
Final Take
If Syrah feels unfair, it’s not because you’re bad at the game — it’s because the game does a poor job of explaining how this fight is supposed to work. Syrah punishes instinctive play and rewards patience, planning, and control.
To beat Syrah, you need to:
- Stop rushing the inner defenses
- Kill shore guns first
- Use smaller, controlled attack groups
- Repair often instead of forcing the fight
- Bring heavy ships only at the end
Once you switch to this approach, everything clicks. The fight stops feeling random or impossible, and starts feeling deliberate and winnable. You’re no longer throwing ships away — you’re dismantling the island piece by piece.
And when it finally works?
Yeah — it feels really good.
Read more articles: